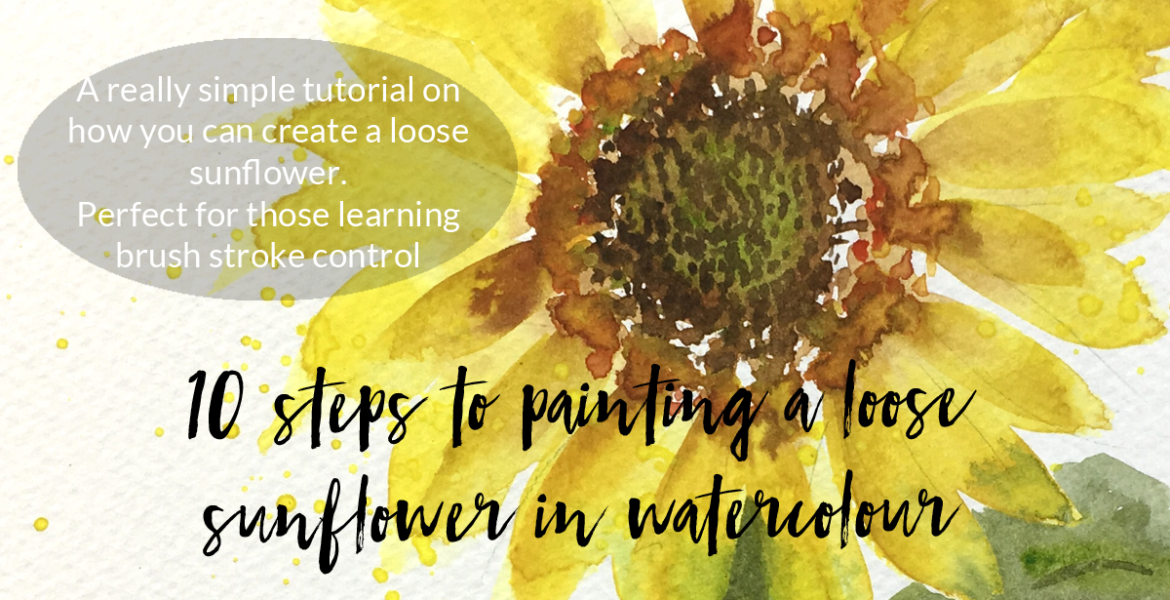
10 steps to painting a loose sunflower in watercolour
Sunflowers are such a bright and gorgeous flower, and make any image instantly happier. I’m putting it down to colour theories and the emotions we get from yellow. It’s a warm colour, usually denoting the sun, brightness and clean, airy …
I don’t actually paint Sunflowers a lot, however my Maddie, my daughter asked me the other day to show her, so I thought I would document the process and share with you too!
When it comes to watercolours, there are some basic techniques that need to be practiced before you will get the results you want, and taking a small class, or online tutorial will certainly help. We actually have small classes available in Burleigh Heads, so check out our dates if you want to find out more about colours, brush strokes, the correct equipment and more.
But for now, I’m going to dive straight in, assuming you have a certain level of painting.
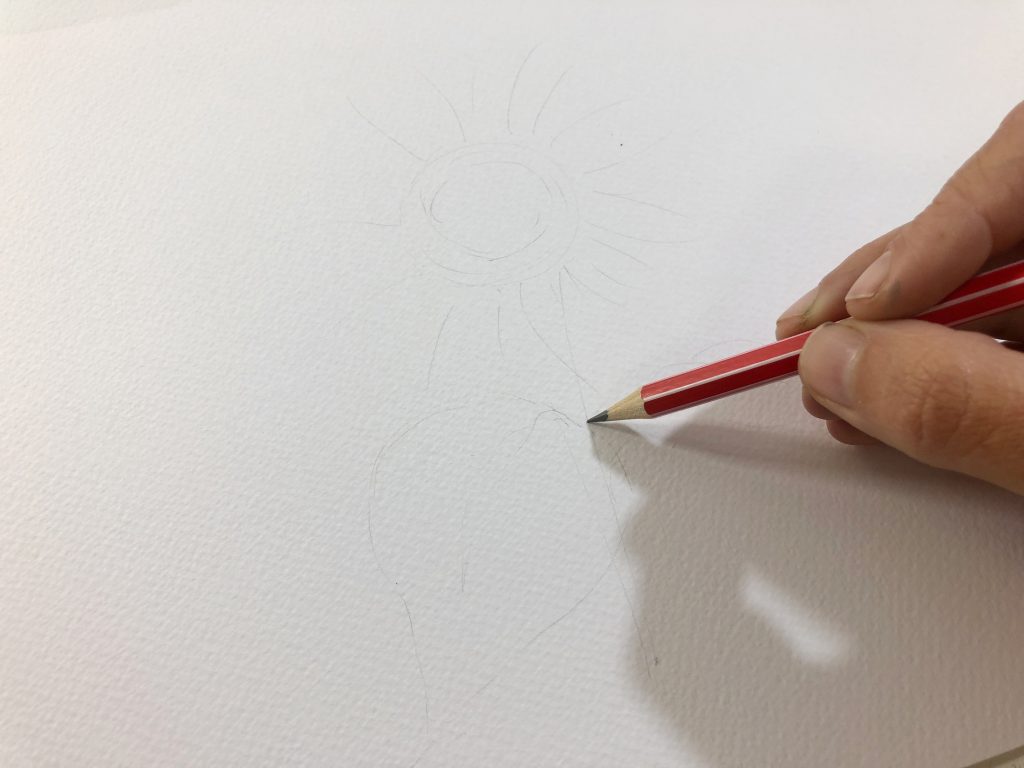
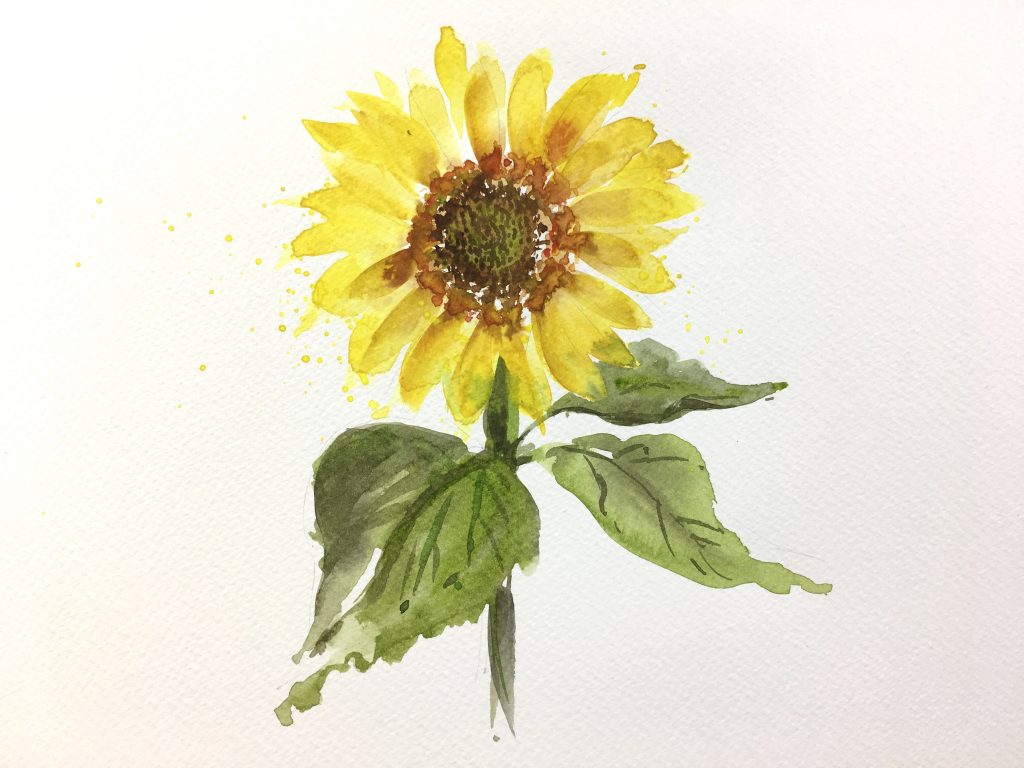
1, It is not always necessary to mark out your flower shape, however it does help to keep you in the right shapes, and plan out a little on where you will place your brush stroke.
HANDY TIP, Use watercolour pencils to draw your shapes, and that way you wont be left with the pencil drawing underneath!
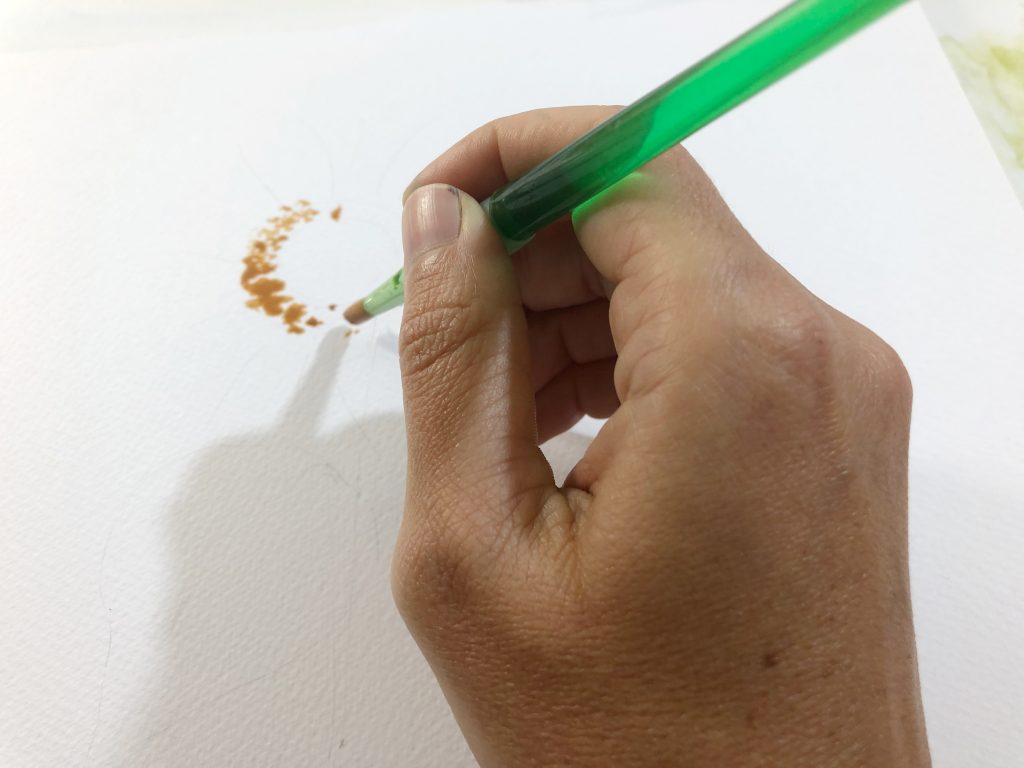
2, I start painting by mixing an orange brown colour. I use lemon yellow, cadmium red and a small amount of burnt umber. I use Art Spectrum paints too, as they are amazing and have really strong pigments.
Using a stipple brush, or even a cheap brush and cut the bristles shorter. I begin dabbing the brown in a circle, creating the outer edge of the sunflower face. I’m careful to use a fairly wet mix here, so it doesn’t dry too quickly.
3, While the ring is still wet in many places, I wash and re dip my brush in the yellow. Using a lemon yellow deep or a mix of lemon yellow and cadmium red will warm the tones making them perfect. I use my size round 10 brush here and start each brush stroke slightly touching the ring. Using a slanted hold and angling the handle in the direction I am painting, I touch the tip to the wet paint of the ring. I then apply pressure to the brush, allowing the bristles to fan out and create a wide stroke. I pull the brush along, and gradually angle my brush vertically, so that only the point is touching. This pulls the stroke back in and creates a long petal like shape. By touching the tip to the already wet circle, it allows the brown to slightly bleed into the yellow.
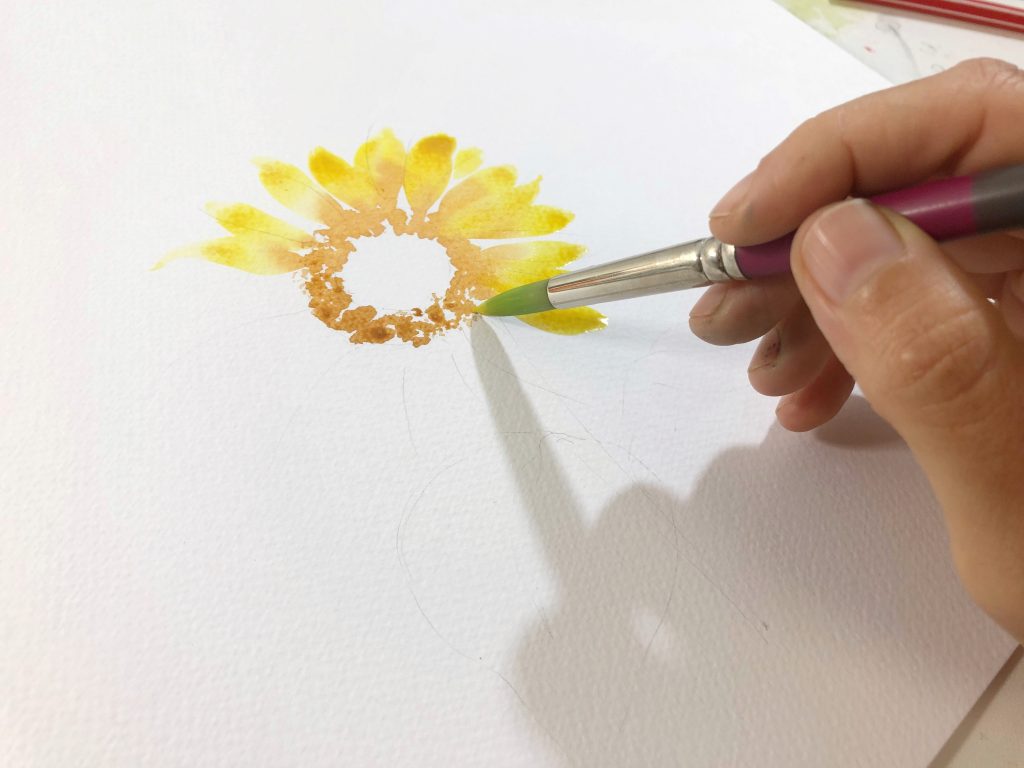
4, Repeat this process until you have all your petals. You can add some extras around the outside if you like, and make sure that some of the petals touch, allowing the paint bleed.
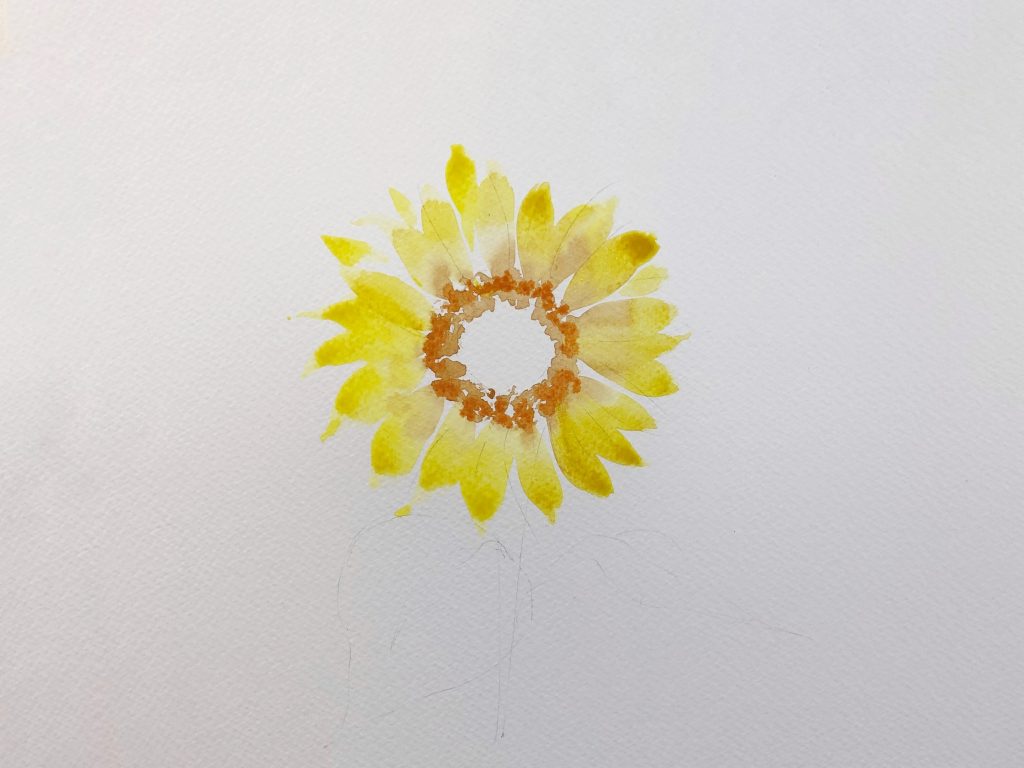
5, While this is still wet, apply a darker ring of burnt umber or sienna. I’ve also added a little cadmium red here, to bleed into the brown creating more of a pop.
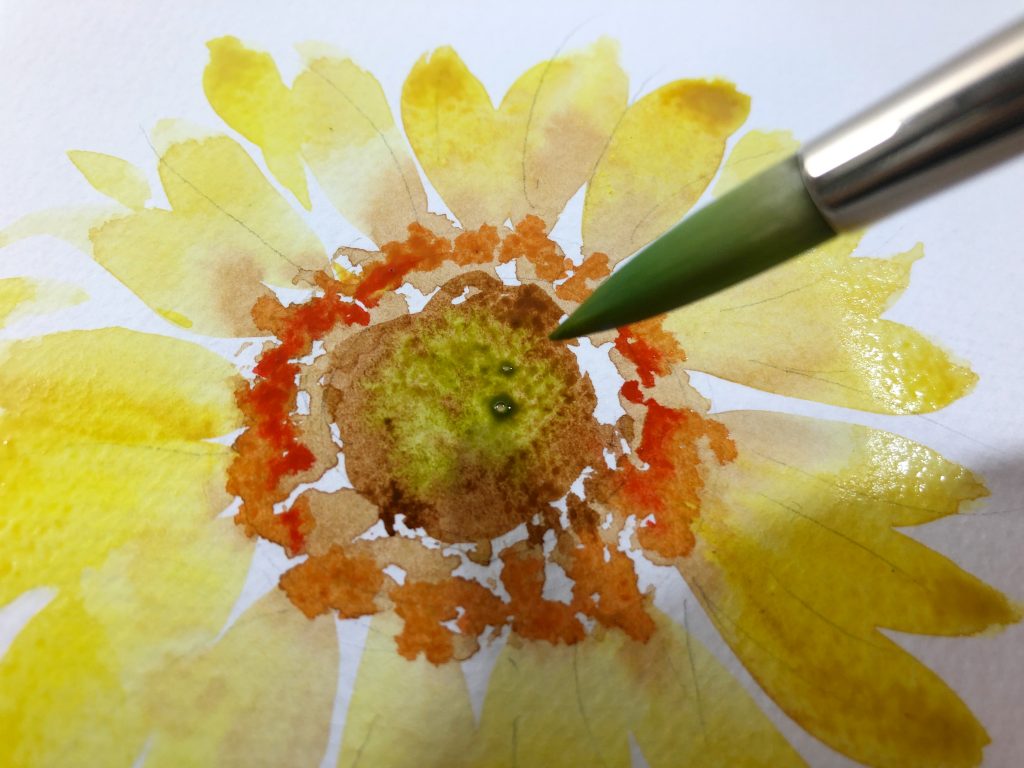
6, Using a sap green mixture, then create a circle in the middle of the existing circle. Leave some white gaps to create highlights and interest.
7 While the face is drying, I then move onto the stem, attaching it to the bottom of the flower. If the yellow is still a little wet, try touching the green to the yellow to create that bleed which adds to the loose elements.
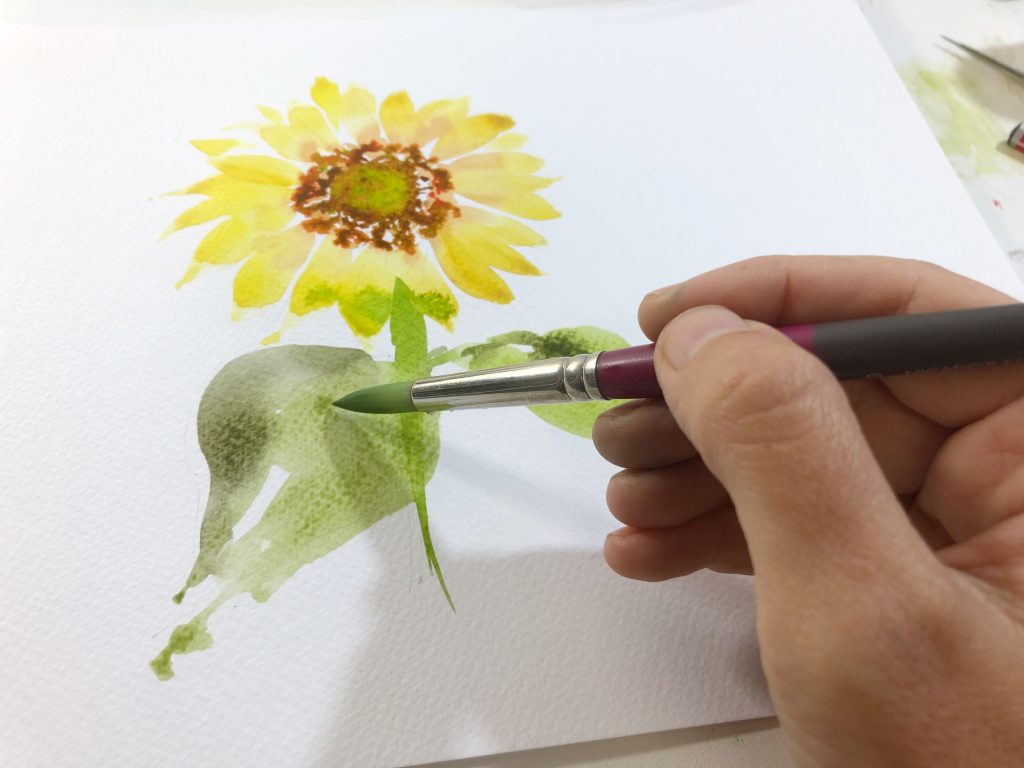
Using my size 10 round brush again, I create one quick stroke down. I then create two large leaves to the side using the full fan of my brush. I am mindful to work fairly quickly here to create energy in the strokes. By adding some sap green and ivory black mix, it creates a darker green, which you paint on certain parts of the leaf to create depth.
8, I now move back to the face, and using a dark brown mix, I create a series of dots over the whole face. This acts as the seeds. I tend to work in spirals to mimic how the sunflower does look.

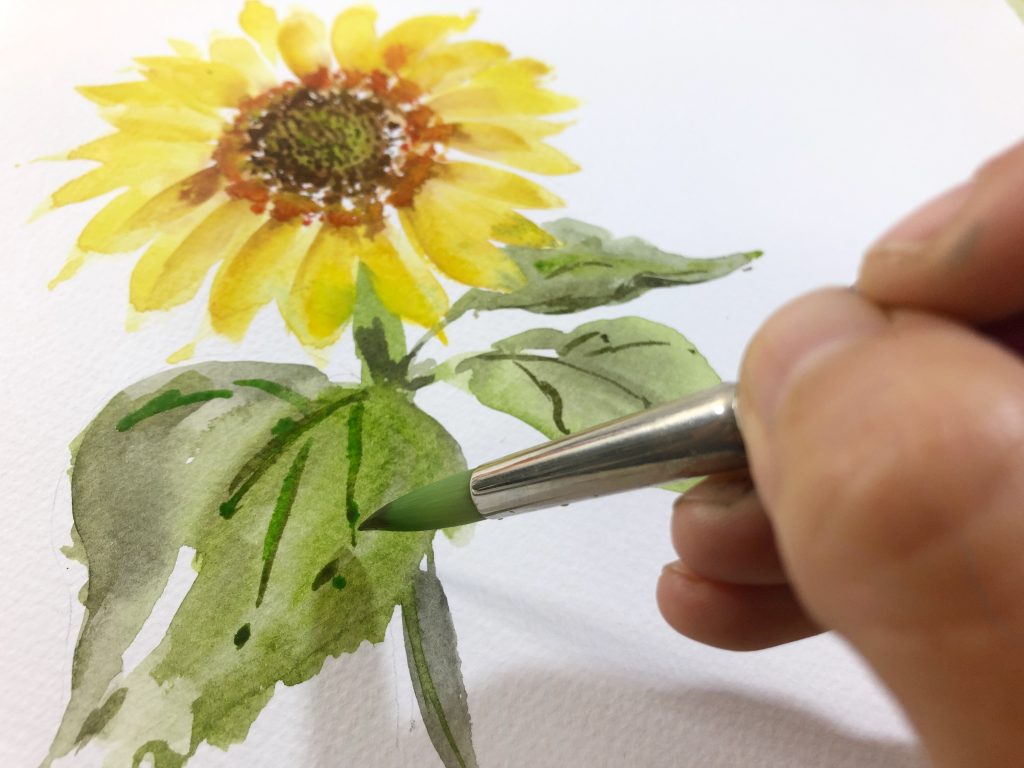
9, The stem and leaves should be mostly dry by now, so you can work on them with a darker green to create the veins of the leaves. I’m not too precious at this stage, as we still want it to look loose. If the paint is a little wet, you can still work on it, it just means some of the lines will bleed, which will look great ether way!
10, I love finishing off my loose florals by flicking paint over the piece. I’ve always loved this look, however its totally optional. I load my brush with the yellow, then using another brush handle, I gently bang my brush on the other brush handle to create the flicks. This is more controlled than just flicking aimlessly. Some of these flicks should hit areas of wet paint, and this will create some nice textures and colour variations.
So there you go! A loose sunflower, that is super easy to create. Feel free to add more to your image, or mix other flowers in the piece.
Id love to see what you’ve created from this tutorial, so please share your creations on Instagram and tag me @iampoppydesigns.